Create shared workspace
This is a step-by-step guide for creating a shared workspace and granting access to it for others using the web app crib.utwente.nl/gcp-canvas. The shared workspace can be shared with teachers, TAs, and students. For most steps there will be a visual example provided so pay attention to a red square as it will highlight the elements important to the step.
First off, open the web app crib.utwente.nl/gcp-canvas.
Then, in Canvas, you will have to generate an access token. This token will allow the web app to collect information about courses for which you have a “Teacher” role. To do this, go to canvas.utwente.nl/profile/settings and scroll down until you see a button
New access token.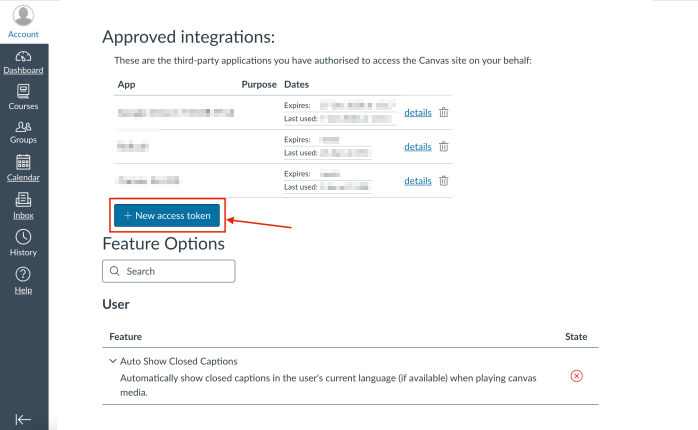
Once the button is pressed, you will be presented with inputs for
purposeandexpires. Forpurposeyou may enter ‘CRIB-shared-workspace’, and forexpiresselect the next day since the token is only needed during the use of the web app. Press the buttonGenerate token, then copy and save the token since it won’t possible to get it again once you leave the page.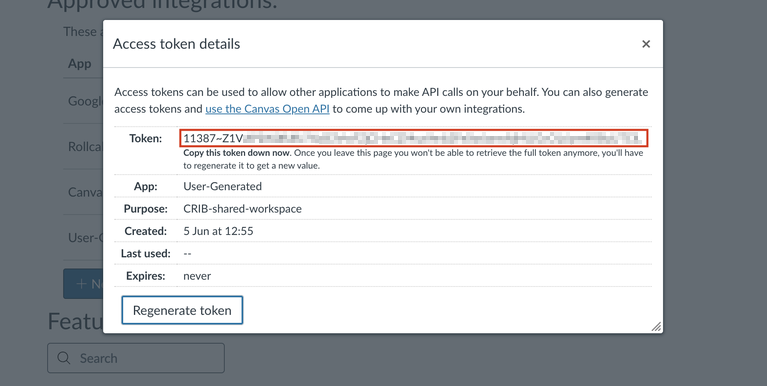
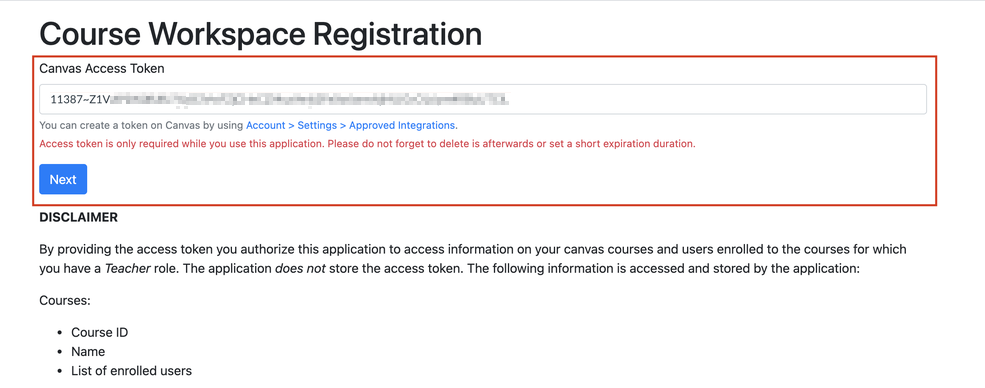
Now, in the web app, paste the Canvas access token in the text box and press the button
Next.
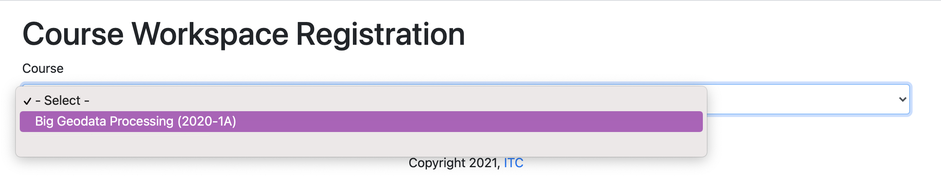
You will be presented with a list of courses. From this list, select the course for which you wish to create a shared workspace.
Enter the name of the workspace. Under the course list there is an input where you can write the name of your shared workspace. A name will already be suggested for you but you can, of course, change it.
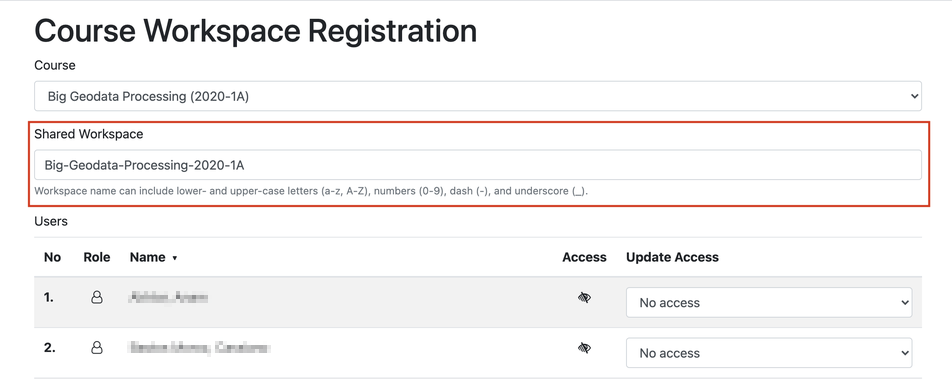
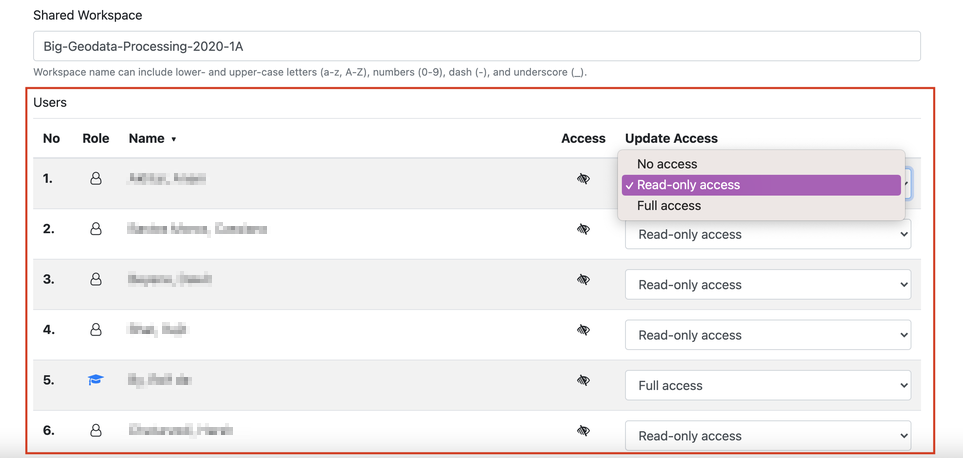
Set access rights for each person. Under the workspace name input, there is a
Userstable that contains persons that are involved in the selected course. In the columnUpdate Access, you can set the access rights for the respective person. There are three types of rights:No access means that the person won’t be able to access the shared workspace at all.
Read-only access only allows viewing files and folders within the shared workspace.
Full access permits the person to view and edit any file and folder within the shared workspace.
To make updating access rights quicker, you can use the following two features. Firstly, you can sort the table by clicking on any of the headers. For example, if you want to sort by roles to get all the teachers and TAs at the top, click on the
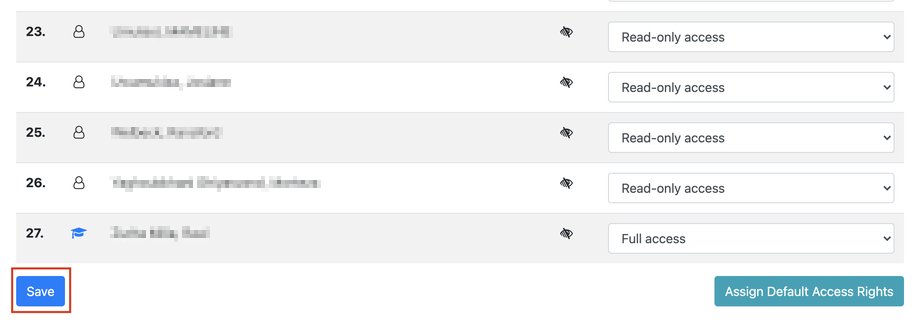
Roleheader twice. Initially, the table is sorted with students on top, then, after the second click, the table is sorted with teachers and TAs at the top. The same way you can sort byNumber,Name, andAccess. Secondly, it is possible to assign default rights to all people with unassigned (i.e. no access) access rights by clicking the buttonAssign Default Access Rightsunder theUserstable. When selected, students and observers will have read-only access while teachers, TAs, and designers will have full access.
Create the workspace. Once you have entered the workspace name and selected the access rights for each person, you can create the workspace by clicking
Savebutton which is located under theUserstable. Next time you or other enrolled people login to the system, the shared workspace will be visible under thesharedfolder.
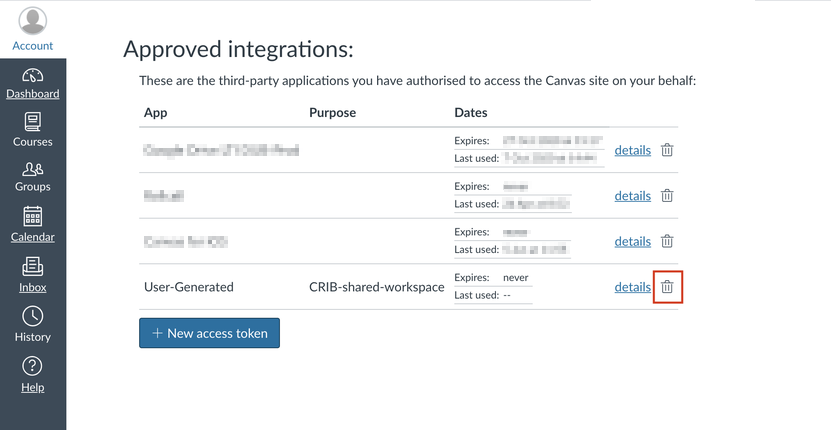
Finally, you should delete the access token you generated in step 2. To do this go to canvas.utwente.nl/profile/settings and scroll down to section
Approved integrations. There, you can delete the token by clicking on the bin icon.